

You will need:
Tools: Jigsaw, Drill - drill bits, Saw attachment, Sanding disc, Glue gun, Staple gun, Hot air gun (optional), NT Cutter
Materials: Wood, Screws, T-Shirt Material, Chop-strand fibreglass cloth, Fibreglass resin & catalyst, Lightweight body-filler & catalyst, Sandpaper, Speaker adaptor plates (optional)
Disclaimer
The project will involve cutting, drilling, sanding, chemical substance, out-of-pocket expense, effort and time. By using the procedures shown here, you are accepting all financial and health risks involved and you are responsible for any loss or damage incurred on yourself or your car. Modifying your car doors maybe subject to country or state laws. Any tickets, traffic violation, or accidents resulted from using my procedures is your responsibility, not mine. Use these information at your own risk.
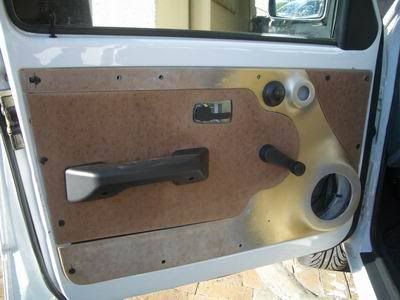
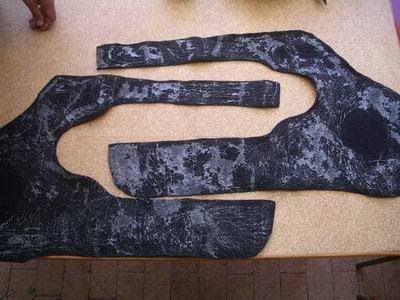
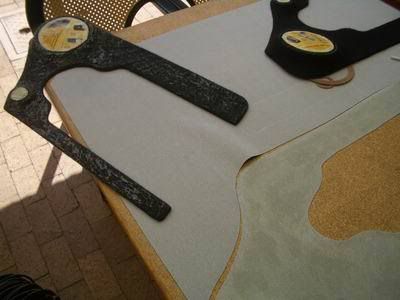
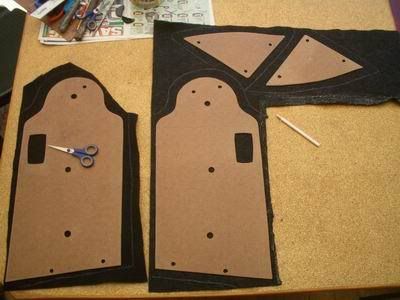
Start off with a basic design of the door panel on paper. Ensure that speaker protrusions will not get in the way of existing features in the car (window winder, mirror adjuster, glove compartment when open, etc.). Remove the original door panel and trace it on a suitable piece of wood (in our case of the MK1 golf, it is 3.2mm MDF). Both mid and tweeter are mounted to the metal of the door, with the panel merely serving as a cover. The speakers are positioned to obtain the best possible imaging. Always wear gloves and safety goggles when working with power tools as well as a mask when applying or sanding fibreglass.
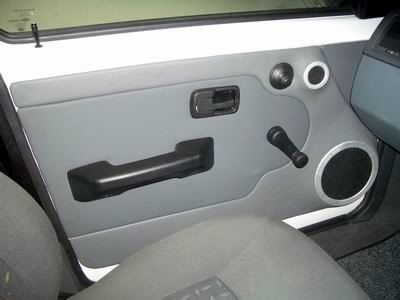
This is the finished build.


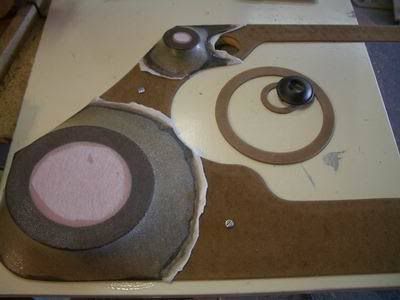
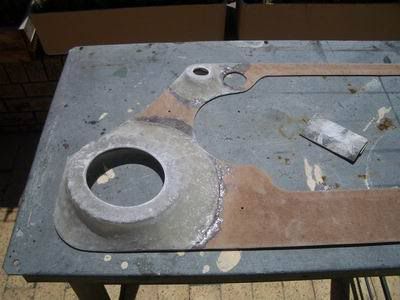
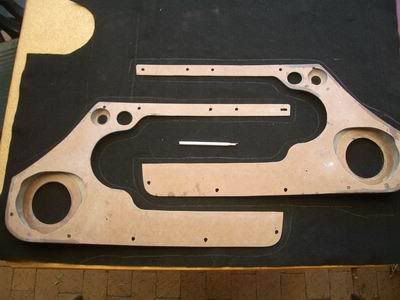
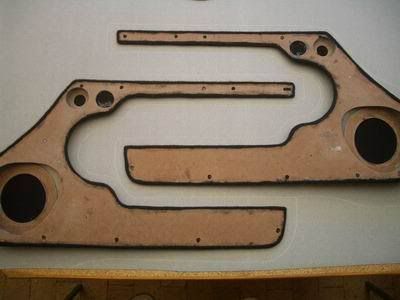
Cut out the basic shape of the door and mount the panel on a backing board, to allow easy construction of the fibreglass moulds. Secure the mid and tweeter to the backing board using the supplied adaptor plates. If these are not supplied, construct a basic mounting out of wood.
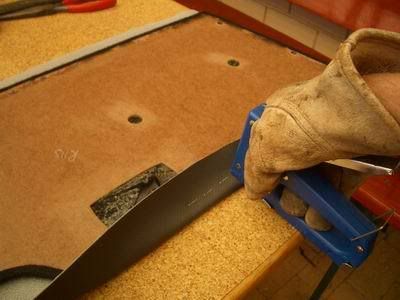
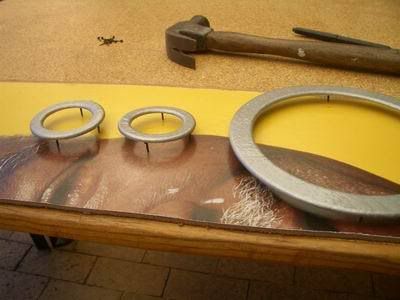
Use the saw attachment for the drill to create small rings for the tweeter out of 3.2~mm MDF. Secure the wood to a backing board using small nails at the centre of the ring to ensure that the motion of the saw does not rotate the wood. Start with the largest diameter and work inwards.
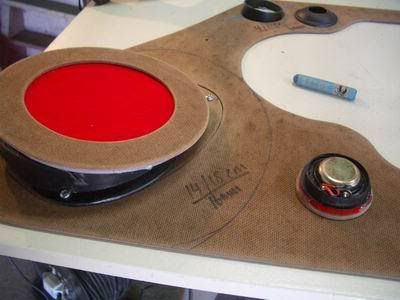
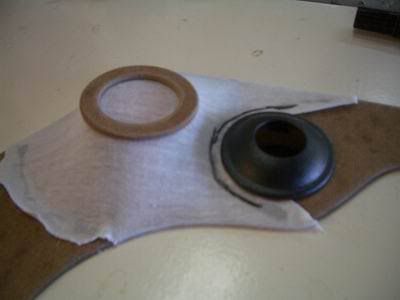
The thicker rings form the base of the fibreglass mould, while the thinner rings are used as beauty-rings to hide the transition between the vinyl and acoustic cloth, as will be seen later.
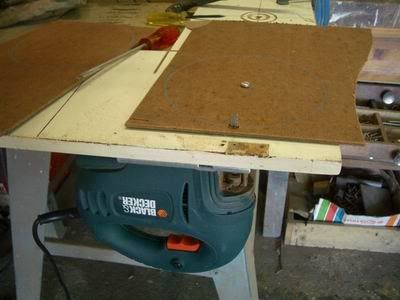
To create perfectly circular larger rings, mount the jigsaw (or router) on the underside of a piece of wood or task-specific table. Add a piece of wood to guide the jigsaw blade, thereby avoiding the natural outward progression of the blade. Screw the centre of the circle into the wood and rotate to obtain a circular cut-out. Start with the largest diameter and work inwards.
The standard procedure is to build a mount for the speaker, fibreglass over the mount and fit the speaker outside. In our case, the fibreglass panel forms a cover for the speaker, so the construction is slightly different. Attach the thicker rings to the mid and tweeter using a glue gun. Use very few drops of glue to ensure the ring can be pried off easily later. Add material on the underside to ensure no fibreglass is messed onto the speakers.
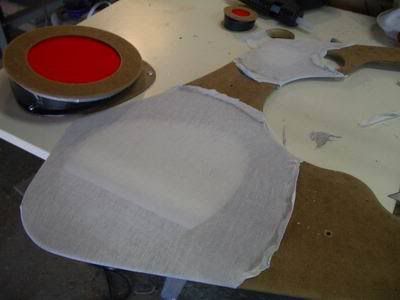
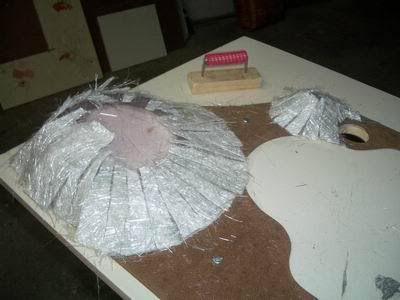
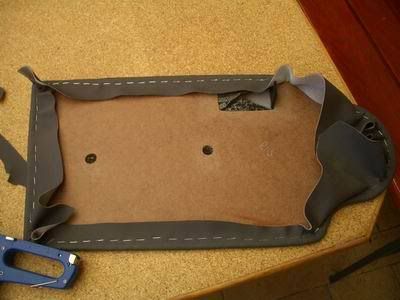
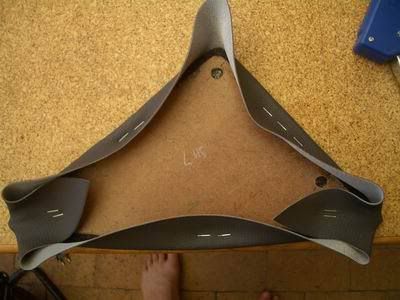
Remove the main panel from the backing board and lightly stretch some cotton (T-Shirt) material over both openings. Secure the pieces into place using a glue gun.
Trim back the material neatly to ensure that the panel may be mounted snugly back onto the backing board. The material should not be stretched too tightly at this point, since the speaker will cause additional stretching to occur.
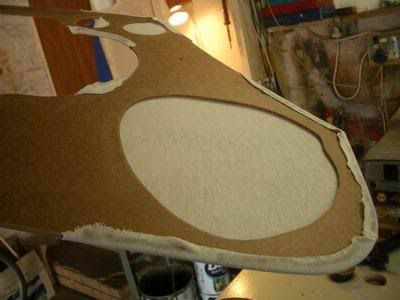
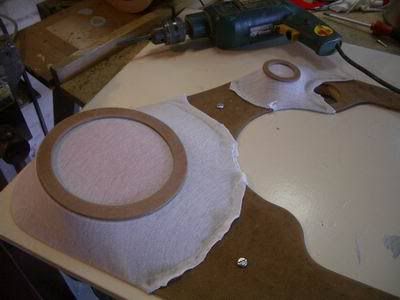
Secure the panel back on the backing board using screws from the top and bottom. Ensure that screws entering from the bottom are positioned to allow easy removal after fibre-glassing. Place the beauty-rings into place to see the final fit.
Ensure that the tweeter mount does not interfere with the mirror adjuster. This may be changed by adding more glue in the right place, thereby changing the position where the material starts to rise.
Mix up a batch of fibreglass resin with catalyst. Around 100~ml (per door) should be enough to soak the cotton material. Apply with a paintbrush or old toothbrush. There is no need to apply resin to the centre of the rings, since this section of the material will be trimmed away afterwards.
Don't forget to take a lunch break! If possible, get someone to prepare you something nice while you kick back and admire your handy-work so far. The speed at which the chemical reaction takes place depends on the ratio of resin to catalyst. Read the instructions to obtain the optimum percentage.
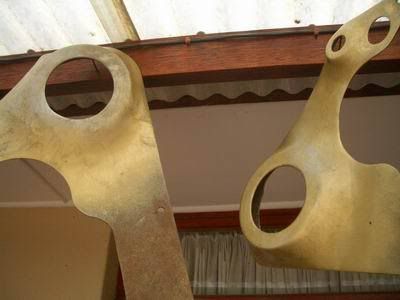
Once the resin has set, cut up some fibreglass chop-strand to the correct sizes. This is used to strengthen the mount. Mix up another batch of resin and apply to the original mould before laying on the chop-strand. Add more resin using a paintbrush in a stabbing motion to remove all the air bubbles.
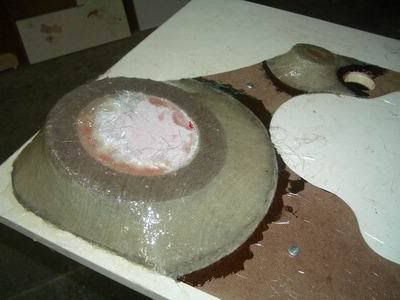

Allow the resin to harden completely. The mount should feel sturdy and strong when dry.
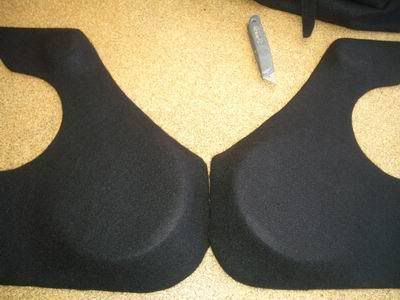
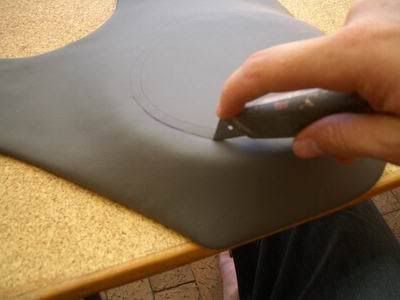
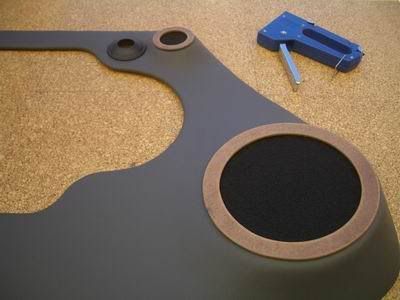
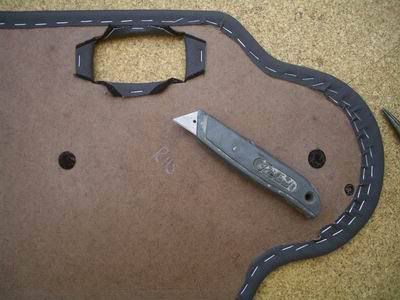
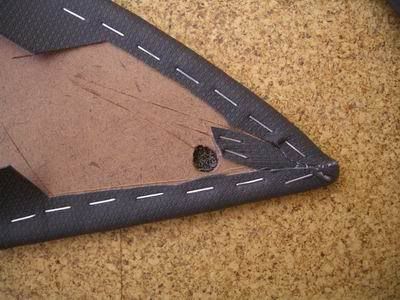
Remove all the screws and pry the panel off the backing board. The weak bonds of the glue-gun glue should break easily. Cut out the centre of the speaker rings using a sharp blade. Do the initial rough sanding with a orbital sander or sanding disc.
Check that the panel fit is still accurate. Ensure that the window winder is not obstructed and that the mirror adjuster appears in the correct position.
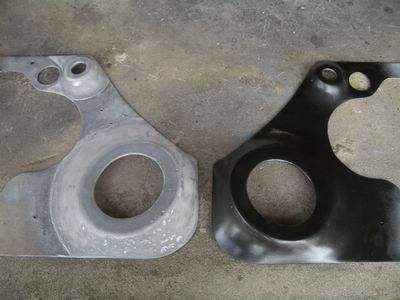
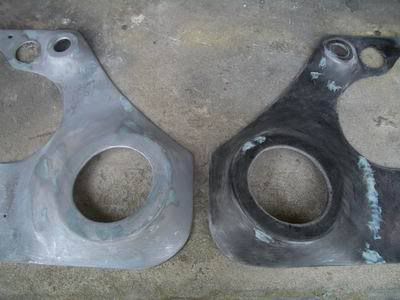
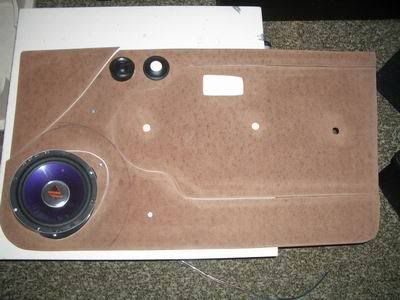
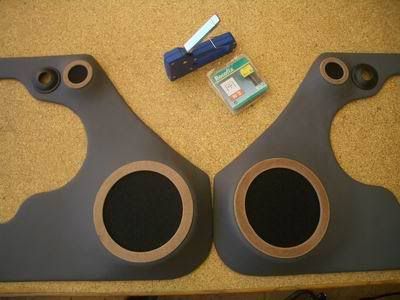
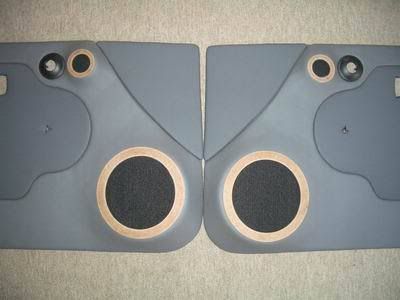
Create a second panel for the the other side of the car - the exact mirror image of the first. The two panels shown are at different stages in the finishing-off process. After initial sanding, mix up a batch of lightweight body-filler and smooth out the fibreglass areas. After sanding, spray the area in a uniform colour to highlight uneven surfaces.
Apply more body-filler in the required areas and allow to dry. Sand the areas and spray again to bring out the mistakes. This process should be repeated until you are happy with the overall smoothness.
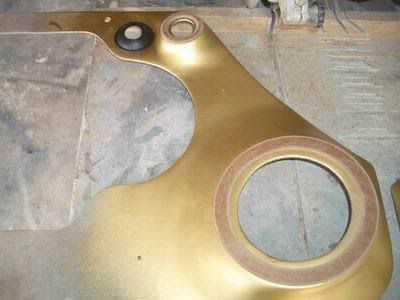
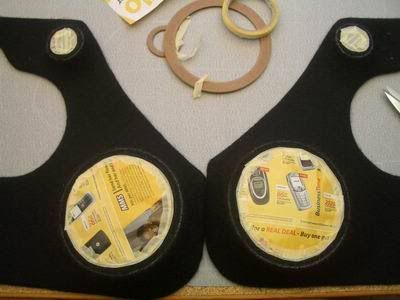
After all the sanding has been completed, place the mirror adjuster surround and beauty rings into place to get a better idea of the final product.

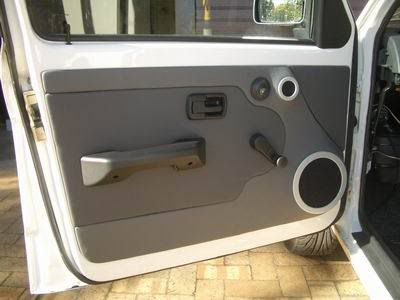
Mount the panels to the door using the standard clips, ensuring a good fit before covering.
The panels are covered in vinyl. To ensure that the new door panels match the rest of the interior of the car, choose the finish of the vinyl as close as possible the existing colour and finish.
Trace out the shape of the panels on acoustic cloth. The acoustic cloth is used to cover the entire panel. Ensure that no glue is used in the areas where the sound will be travelling through the cloth from the mid and tweeter.
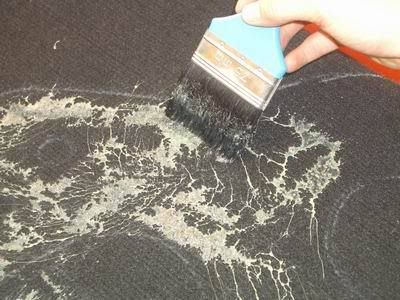
Apply the contact adhesive using cheap paintbrushes which can be thrown away after application. The cost of a cheap brush is less than the solvent used for cleaning.
Apply adhesive on both surfaces to be bonded together - acoustic cloth and fibreglass panels.
Wait until both areas are touch-dry before sticking together.
Stick the acoustic cloth down and trim off the excess around the edges.
Trace out the shape of the panels on the chosen vinyl.
Cover the areas on the acoustic cloth that will be exposed, to ensure that no contact adhesive is applied in those areas.
Apply contact adhesive to both surfaces to be bonded together and wait until touch-dry.
Stick the vinyl into place and cut out the areas where the sound will be coming through from the speakers.
Place the beauty - and mirror adjuster rings into position to get an idea of the finished product.
Repeat the steps for the second panel.
Cover the remainder of the panels in acoustic cloth and the other choice of vinyl.
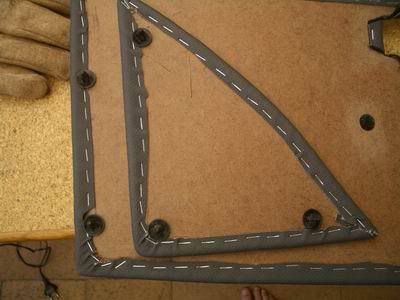
Using a staple gun to attach the vinyl is far easier and faster than to try and glue it down.
Stretch the vinyl into position using brute force or a hot air gun. Beware that the hot air may damage the vinyl if applied for long periods of time.
Neaten up the back of the panels by trimming away the excess vinyl using an NT cutter.
Put the mounting clips into position.
When using the staple gun to fasten the vinyl it is easiest to start with the flat edges and work towards the corners.
Trim the vinyl in the corners to make it easier to stretch around sharp bends.
Note the different colour and finish of the two types of vinyl used.

Paint the beauty rings using your colour of choice. If possible, have someone manufacture them for you out of aluminium to create a professional finish.
Mount the mid and tweeter to the metal of the door, ensuring that they are in the correct position for the new panel to fit snugly over them.
Secure all the panels into place using the previously attached mounting clips.


