


I always work better with pictures so figured someone might find this post useful.
Step 1: Position the car on a level surface
Step 2: Depressurize the fuel system
You can do this by either leaving the car standing for a few days (fuel pump did not work!)
Or you can remove the fuel pump relay (Bottom, right-hand far-most relay #167) and run the engine until she dies (some models might differ with relay numbering).
Step 3: Disconnect the battery terminals
This one might seem obvious but you do not want any current near an open fuel tank! ("Mythbusters" might contest this one though!)
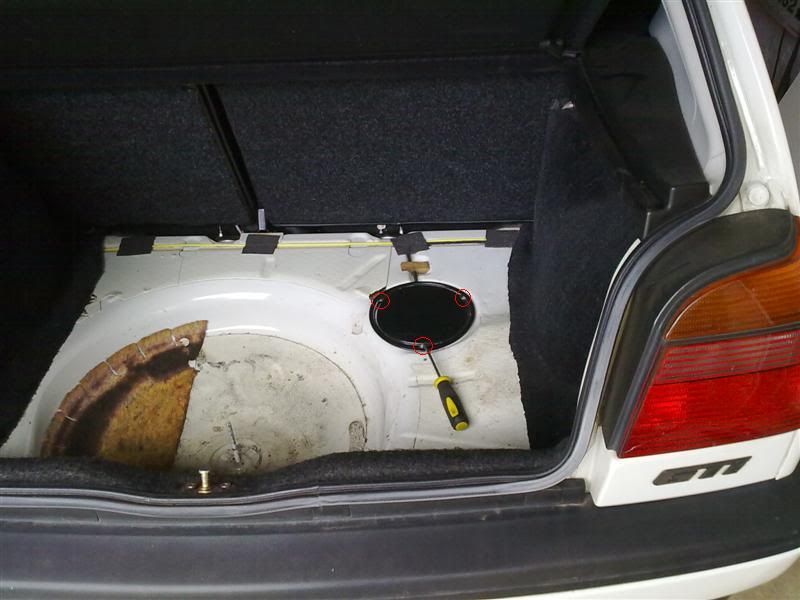
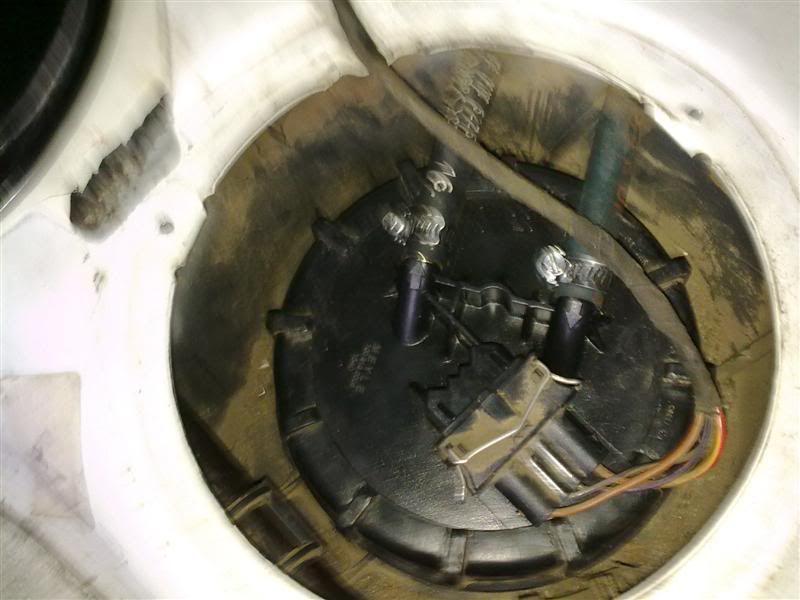
Step 4: Remove fuel pump cover
In the boot, remove the carpet and locate the round black disk which is the fuel pump cover.
http://i1115.photobucket.com/albums/k54 ... 0111_1.jpg
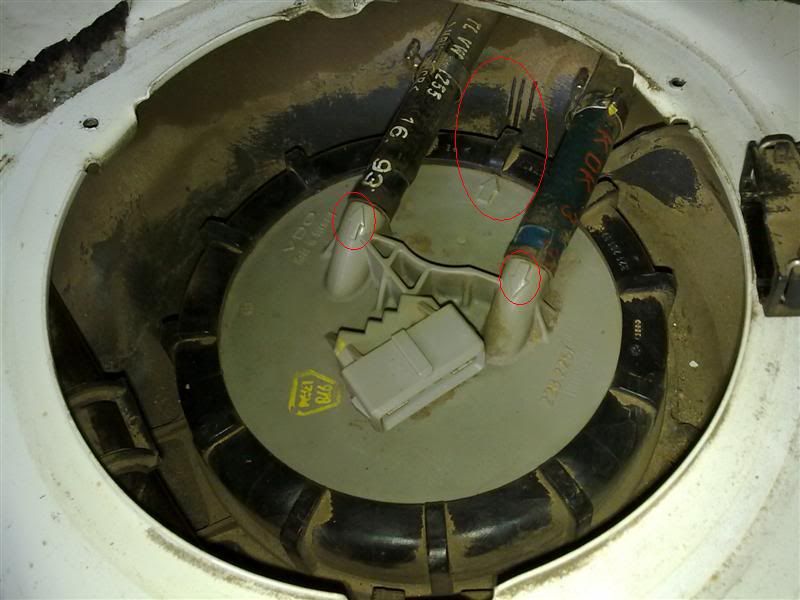
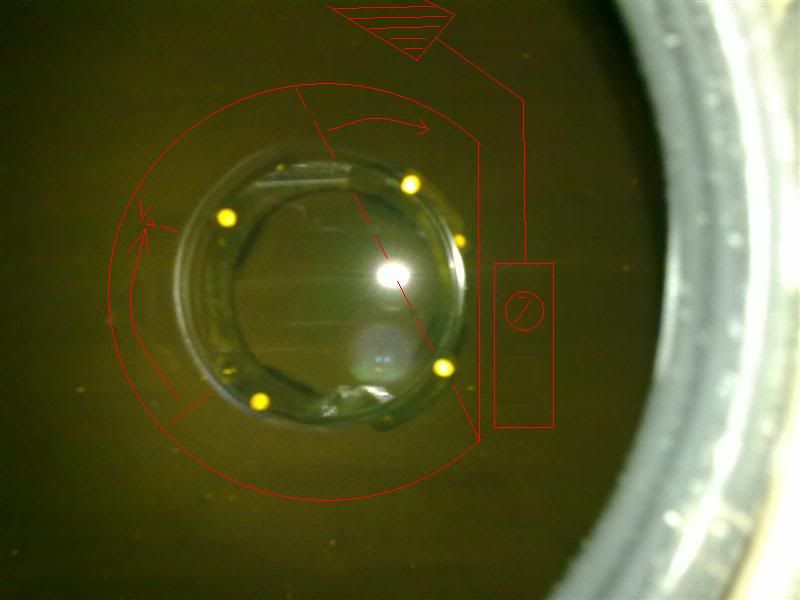
Step 4: Take note of the pump position
Note the arrow for the outgoing fuel line, the arrow for the returning fuel line and the arrow for the position of the pump top-cover in relation to the body markings.
http://i1115.photobucket.com/albums/k54 ... 0111_3.jpg
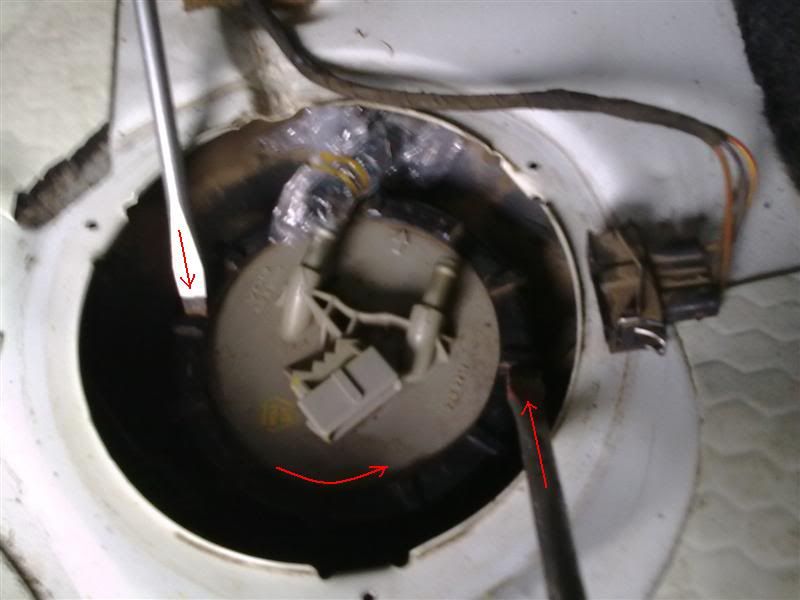
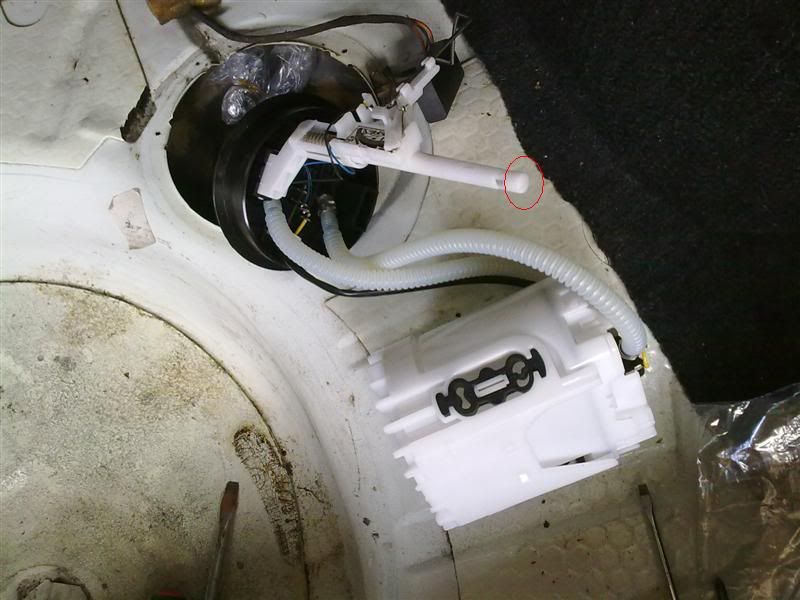
Step 5: Remove connectors
Remove both hose clamps and fuel pump/sender plug.
TIP:Place a rag underneath the hoses to catch any spilt fuel.
Pull off both the hoses (be careful of any residual pressure in the system!), and either plug/cover them to prevent dirt from entering.
http://i1115.photobucket.com/albums/k54 ... 0111_4.jpg
Step 6: Remove retaining nut
You can either use a pump plier or two large flat head screwdrivers to remove the pump's plastic retaining nut (anti-clockwise).
TIP: The trick is to apply equal but opposite pressure on either side of the nut. Since it is platic, it will malform if pressure is only applied to one side which will make it virtually impossile to turn off. Also, being plastic, only use a hammer to get the initial bit unstuck!
http://i1115.photobucket.com/albums/k54 ... 0111_6.jpg
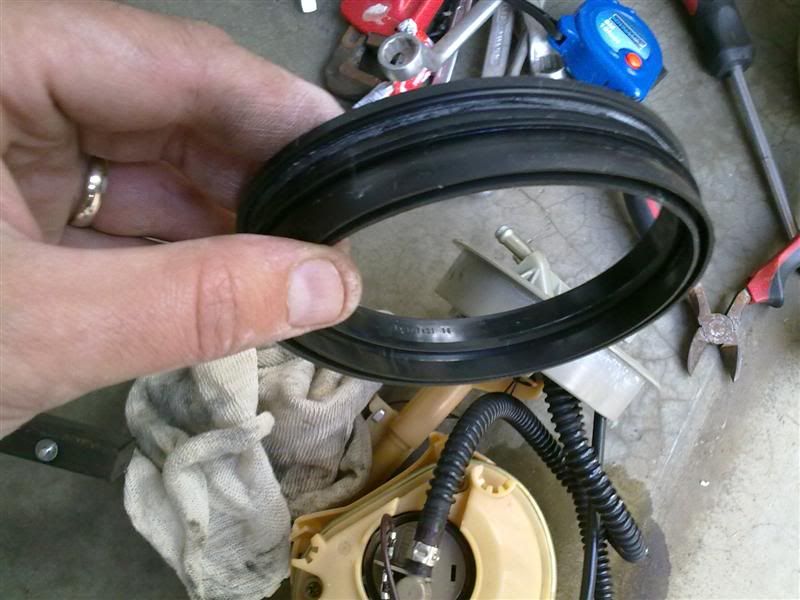
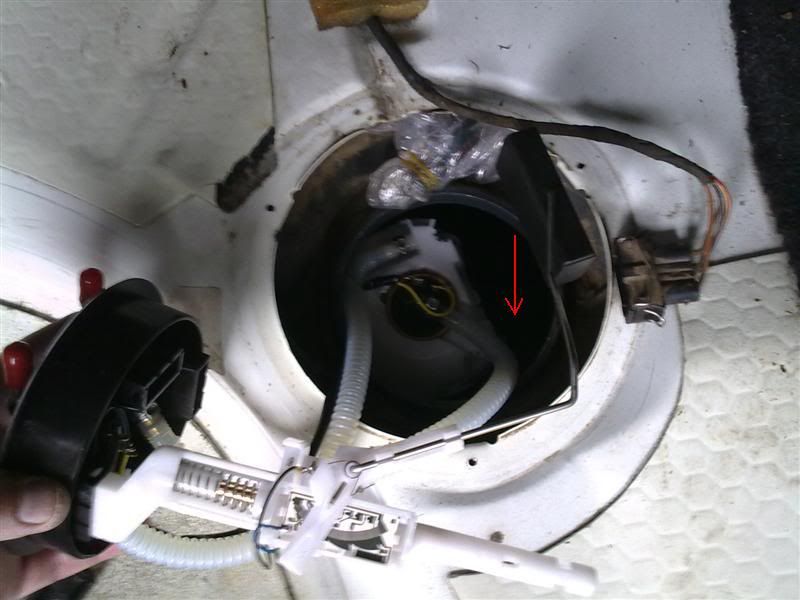
Step 7: Remove the fuel sender unit and pump
Remove the fuel sender unit. Note that a wire arm with a float on the end must also be completely withdrawn. It takes a bit of jiggling, but do not force anthything as it all designed to come out easily. (Do not bend the float arm if you intend to re-use the sender unit).
Next remove the pump by giving it a 1/4 turn in an anti-clockwise direction. This will release the pump from it's bayonette-type connection at the bottom of the tank. Recover the rubber seal and give it a good clean.
http://i1115.photobucket.com/albums/k54 ... 0111_9.jpg
Step 8: Install new pump
Remember to insert the rubber seal first!
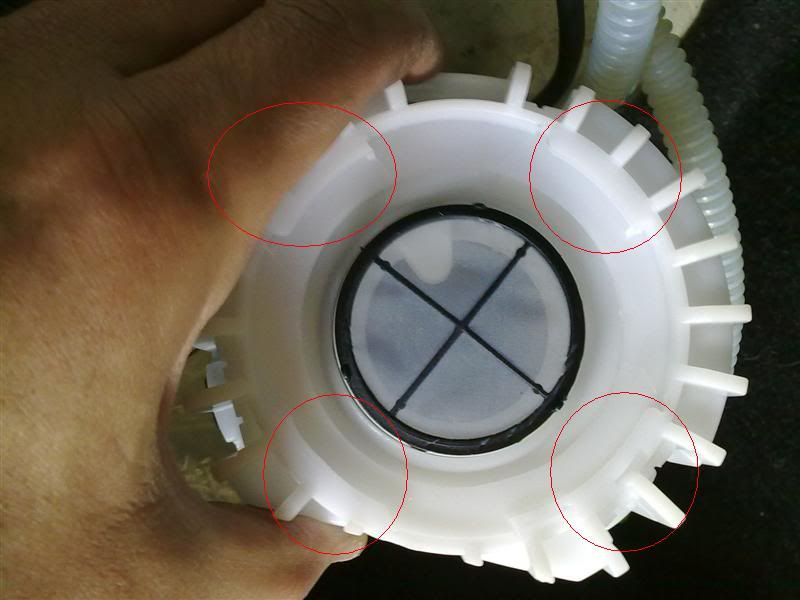
Note the four clips at the bottom of the new pump which fits into the bayonette-like plug at the bottom of the tank.
Gently insert the pump into the bayonette plug (you do not want to damage the fuel strainer at the bottom) and give it a 1/4 turn in a clockwise direction.
http://i1115.photobucket.com/albums/k54 ... 112_11.jpg
http://i1115.photobucket.com/albums/k54 ... 112_12.jpg
Step 9: Insert the fuel sender and pump
Gently insert the float and float-arm into the gap and then guide it upward and to the left (to the top of the fuel pump). Note the shaft of the sender unit is spring-loaded and will rest upright / perpendicular to the cap and push against the bottom of the tank. Therefore you will experience some resistance in the cap wanting to push up until you have tightened that retaing nut.
http://i1115.photobucket.com/albums/k54 ... 111_10.jpg
http://i1115.photobucket.com/albums/k54 ... 112_13.jpg
Step 10: Finish off
Ensure that the pump cover is seated properly with the rubber seal. Fit and tighten the nut in the same maner as it was loosened in Step 6.
Ensure that the arrow on the cover still lines up with the the body! Also ensure that there is no play on the pump cover once you have tightened to ensure no fuel fumes can escape. (It is not unusual for the nut to turn on very tight!
Attach the correct hoses with new hose clamps and plug back the connector making sure it clips in properly.
Reconnect battery terminals and let car run for a few minutes to ensure pump and fuel guage is in indicating properly and that no fuel fumes are escaping!
http://i1115.photobucket.com/albums/k54 ... 112_15.jpg
If all is in working order, replace the outer cover and tighten.
Compliments of ~FREEZABURN!~