- you just installed a downpipe, and you're hearing a metal grinding/rubbing noise.
- you want to reduce your wheelhop.
After installation, your downpipe definitely won't be rubbing anymore (the new bushings keep the engine from rotating as much) and you will definitely notice a great reduction in wheelhop!
This install procedure goes through the VERY EASY process of replacing your dogbone mount bushings on your 1.8T. If this takes more than an hour, you need help. I've added more comments regarding different engine mount bushings at the bottom of this page. These instructions are very detailed, and you'll soon discover how brainless this install is.
Tools required:
- torque wrench
- 5/8" socket
- 13mm socket (yeah yeah I mixed imperial with metric, but it's all I could find and they both fit pretty good)
Step by Step
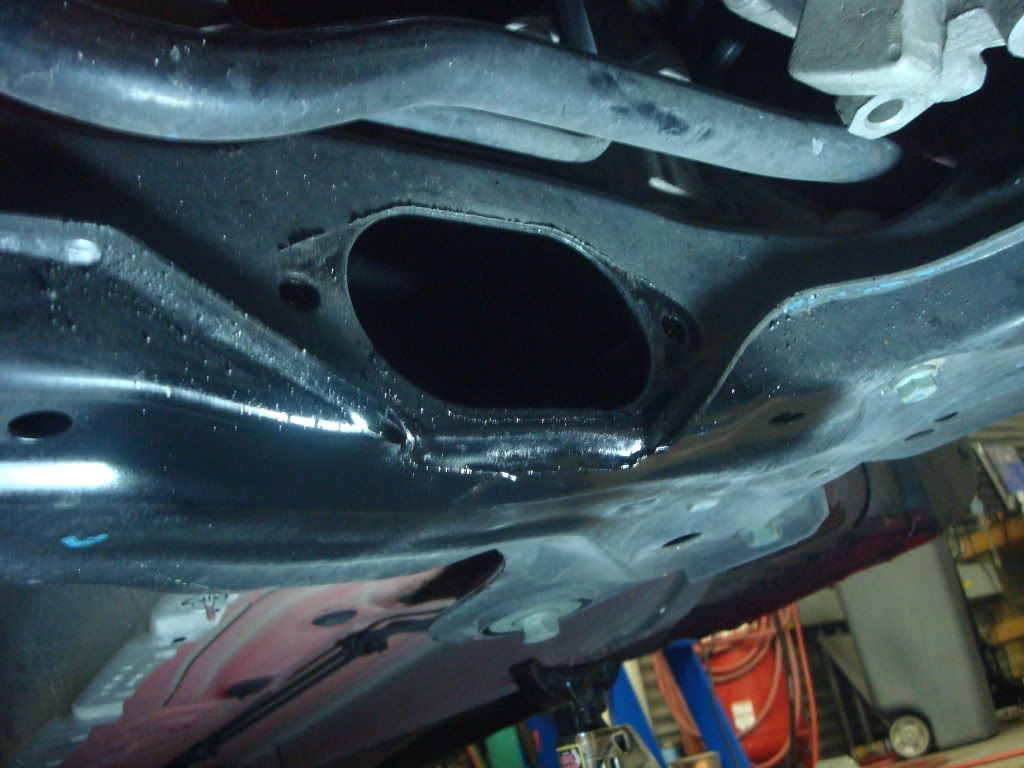
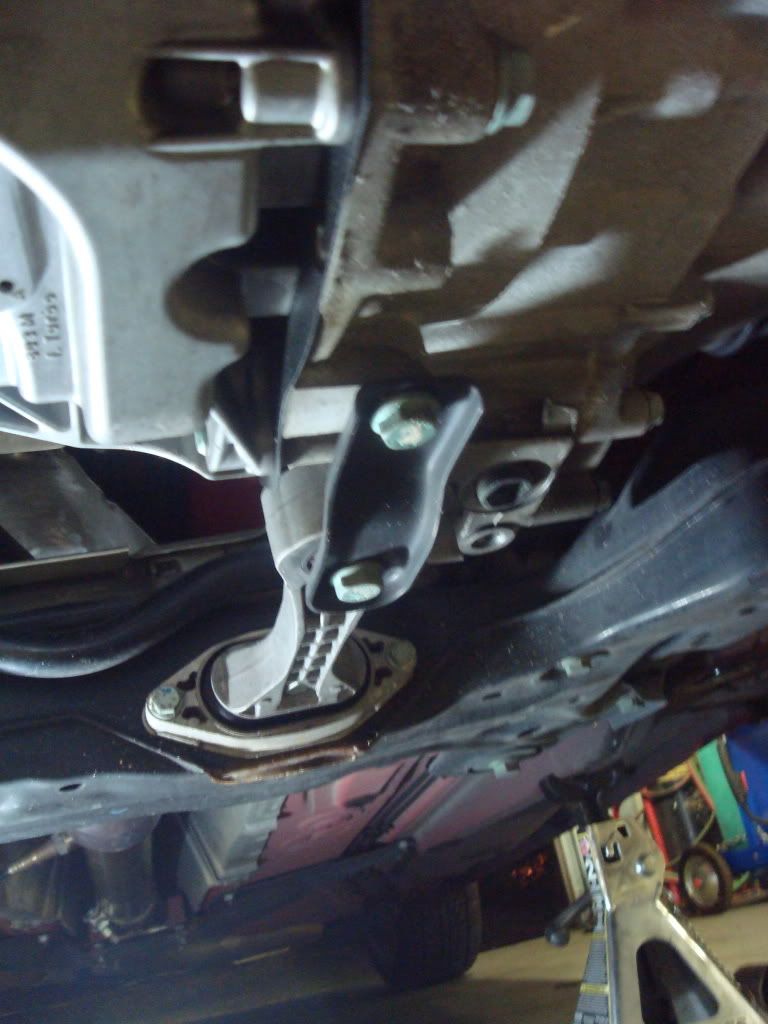
Step 1: Jack up your car, high enough so that you've got enough room to work. The thingy in the top left of this picture is the dogbone mount you'll be taking out.

Step 2: Get your jackstand underneath the transmission to support it. This will make it easier to remove and re-install the dogbone mount.

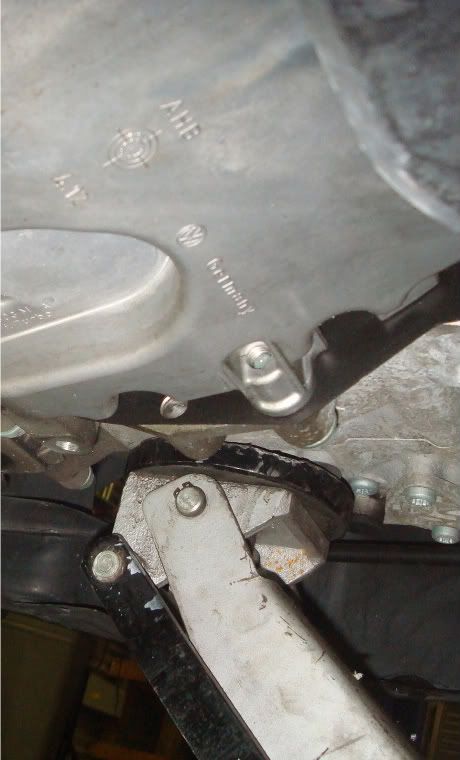
Step 3: Remove the 4 bolts holding the dogbone mount to the engine. There are 2 that are connected to the subframe (13mm), and 2 that are connected to the bottom of the transmission (5/8"). Once you get them out, it looks something like this:

Step 4: unpack your shiny new yellow Forge (or whatever brand you've bought) dogbone mount bushings!

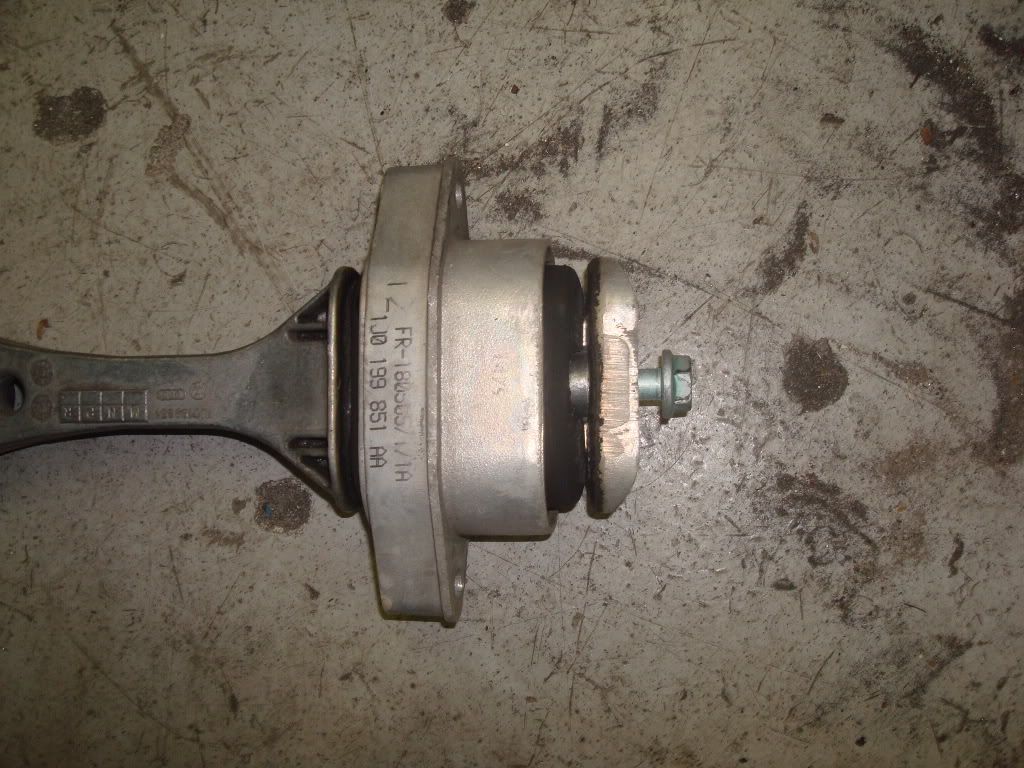
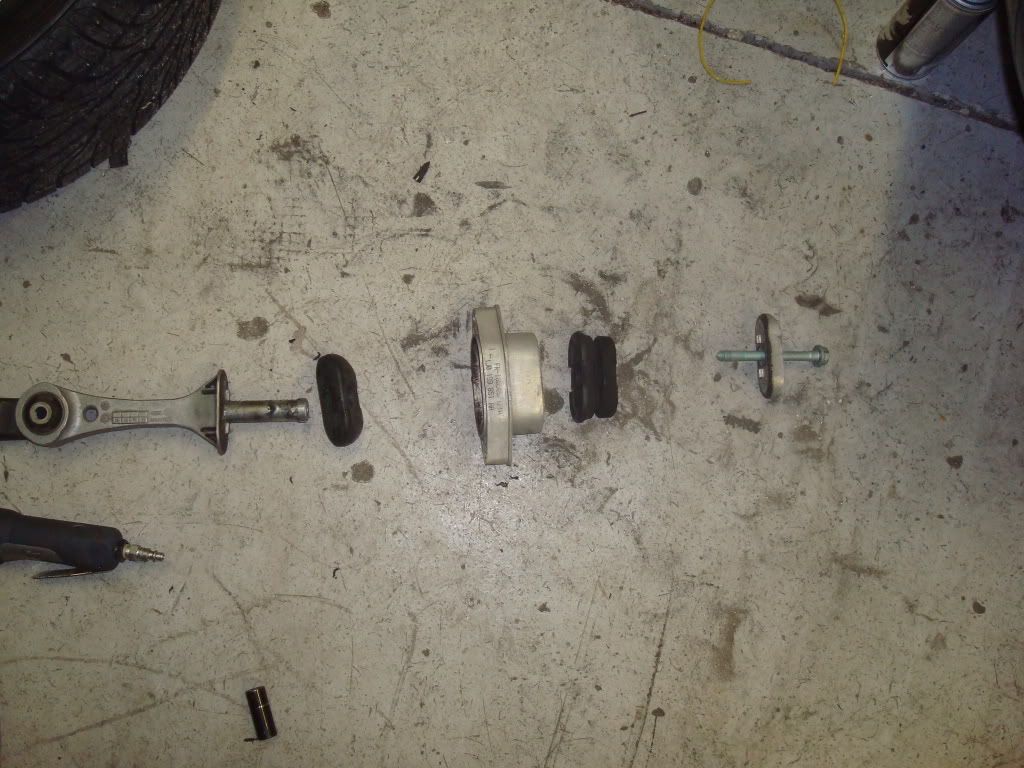
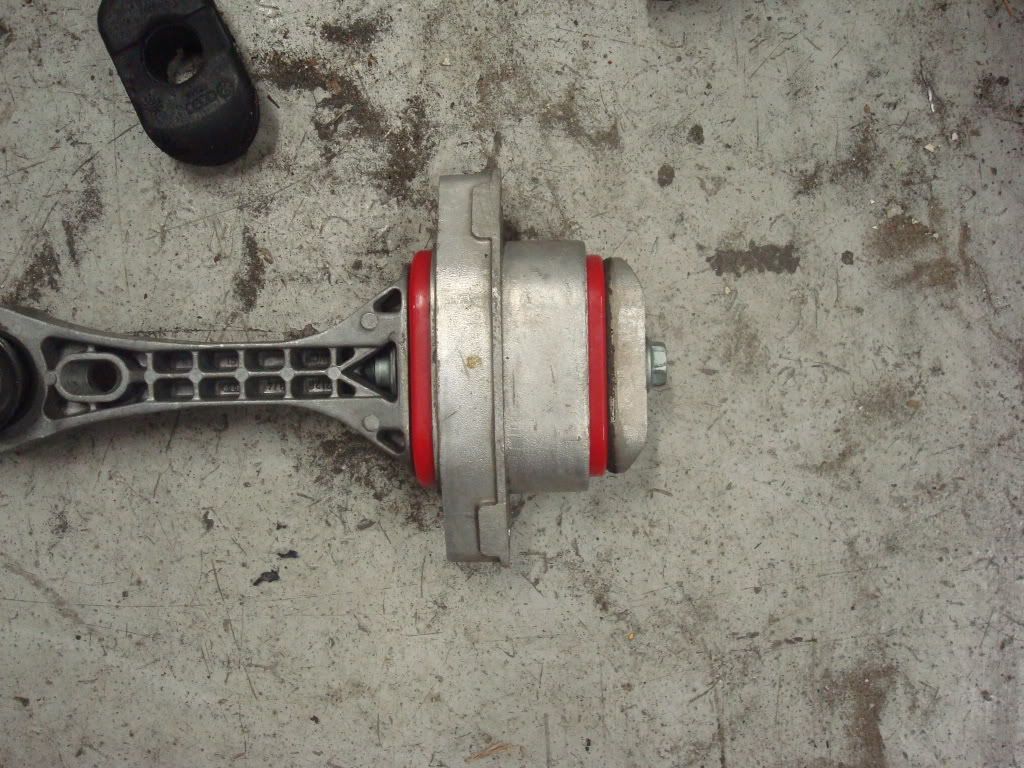
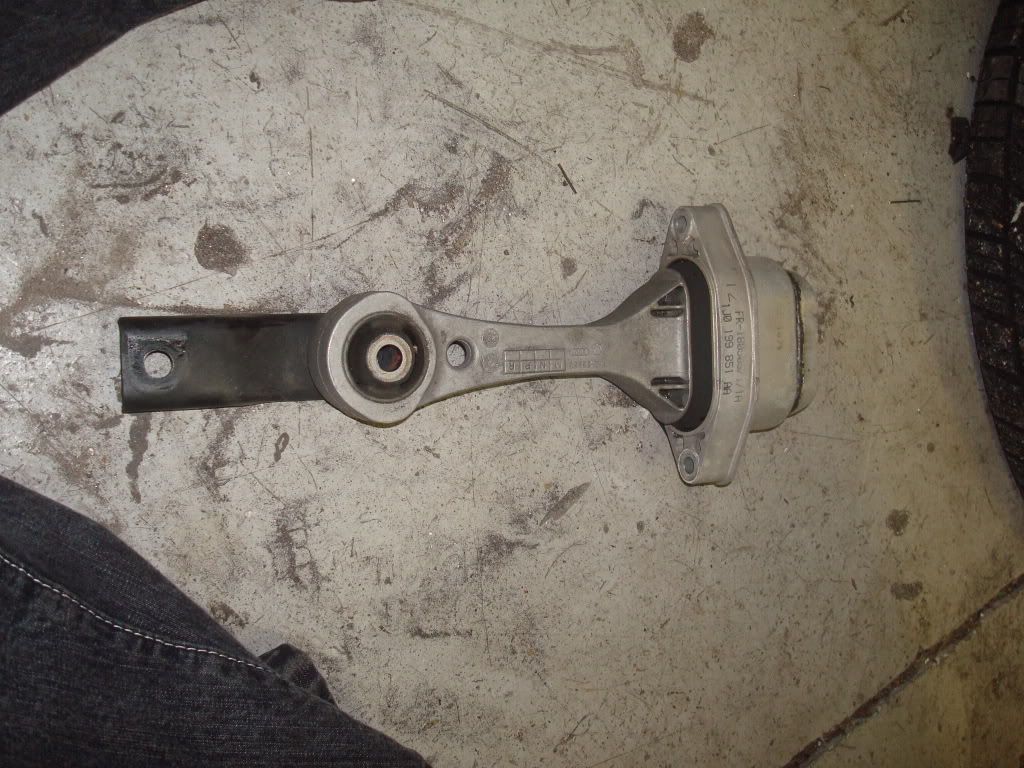
Step 5: Take apart your dogbone mount. There is one bolt (5/8" head) that goes down the middle. Pictures are worth a thousand words, so...

The two black rubber pieces (pretend the blue ones above are black )are the bushings you're going to replace. The stock black ones are pretty soft, and you may find they've adhered themselves to the metal pieces.


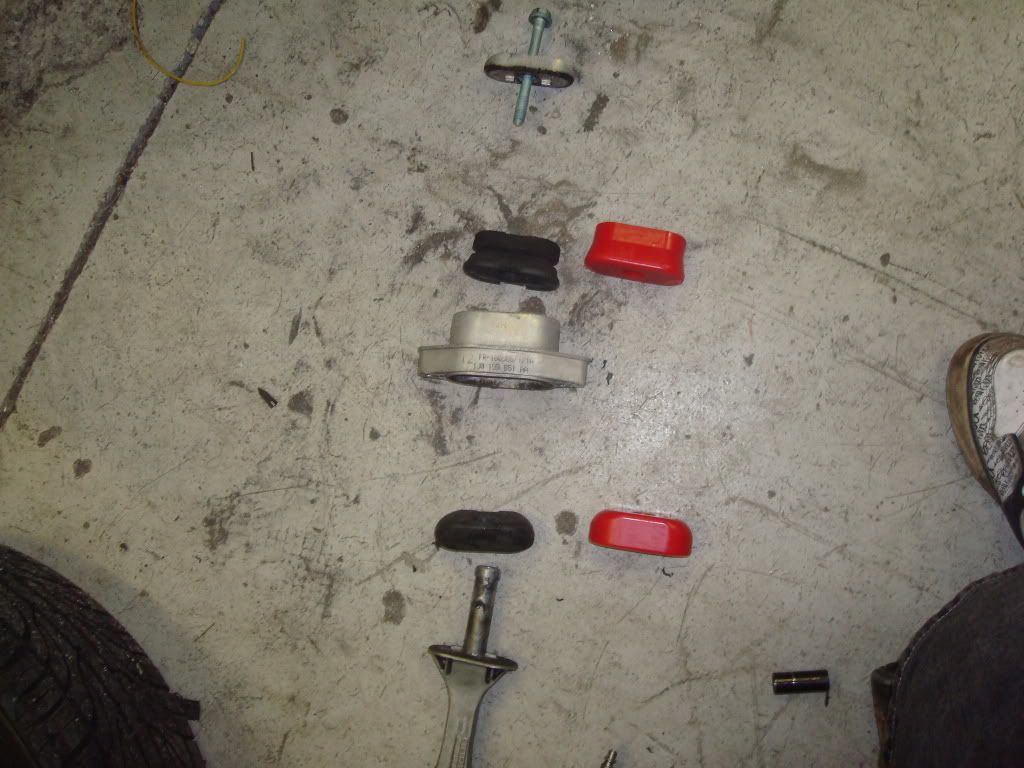
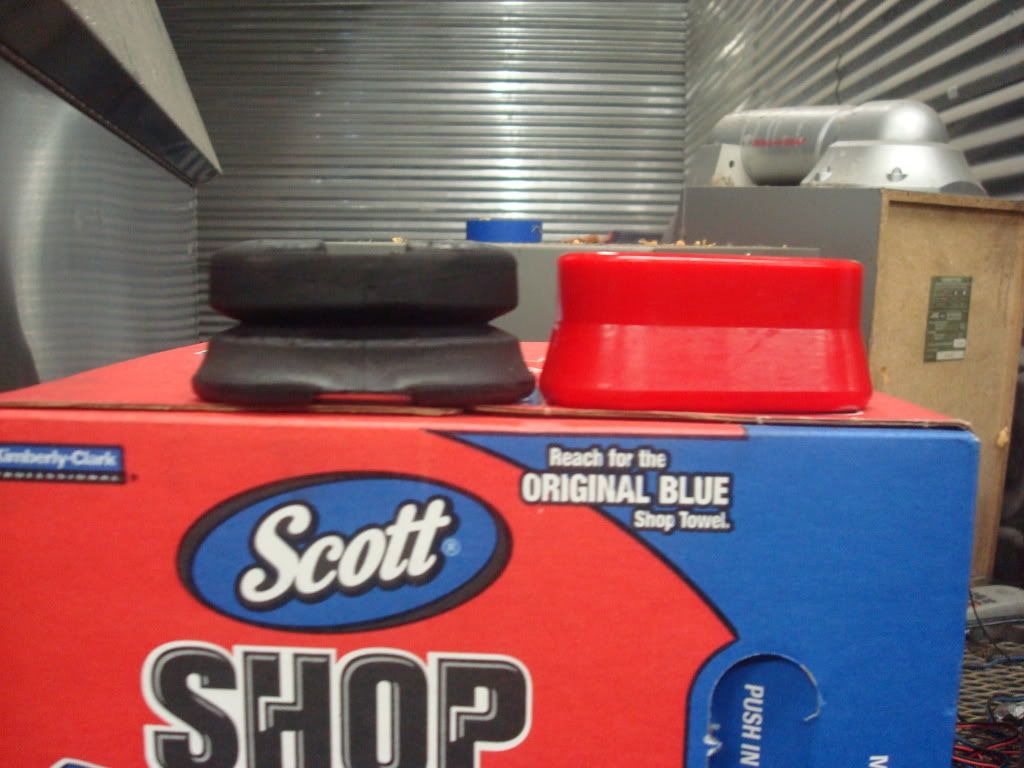
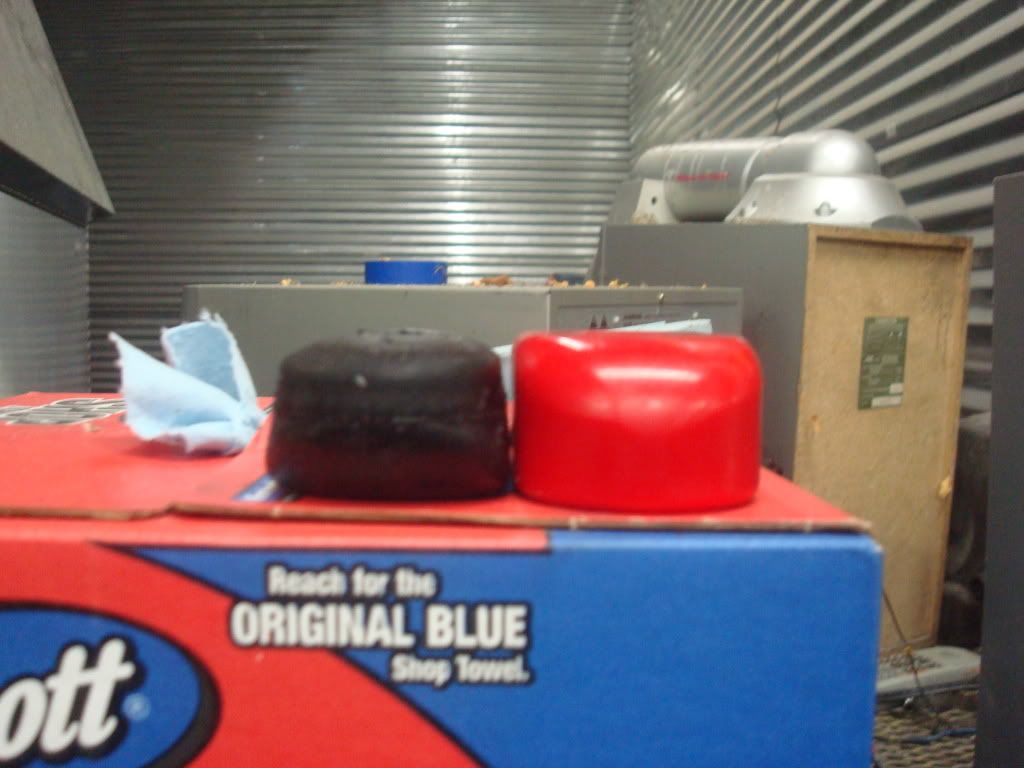
Step 6: I've played with two kinds of aftermarket bushings: the blue poly ones that came with my Brullen 2.5" downpipe, and these yellow Forge ones. Here is a comparison:

The aftermarket ones are slightly taller than the black stock ones, so you'll find you need to really squeeze things together when you reassemble the dogbone mount. You'll notice the yellow and blue ones are a lot stiffer than the stock ones too! (more on that later...)
Step 7: Reassemble! The Forge dogbone bushings came with a bit of grease, so I slightly greased the metal shaft so the bushings would slide on a bit easier. Put the smaller piece in first, and line up the 'grooves' in it with the ridges in the metal (the grooves go downwards).


Step 8: There is a little nut that goes into the end of the compression bolt. Don't loose this thing! The head of the nut is a bit lop-sided. Insert as shown in the picture:
The little 'lip' on the edge of the head goes on the outside. If you put this nut in the other way, the compression bolt won't line up with the threads and it's not going to go in.

Step 9: This step is by far the most difficult. I don't have a vice, so it made things a bit tricky. You will find that the compression bolt doesn't quite reach the little nut. So, you've gotta squish the entire dogbone mount and then turn the compression bolt in order to get the threads to catch. This might work better in a vice, but I just used my body weight.

I've got my torque wrench underneath everything, and I just push down like mad...rotating my body around it until the threads catch. This is probably easier with a vice -- it was definitely a pain to do! Eventually, you'll get it together. Torque the compression nut to 12ft-lbs. I put a bit of loctite on the compression bolt too, just to keep things secure.
Step 10: Re-insert the dogbone mount into your car!

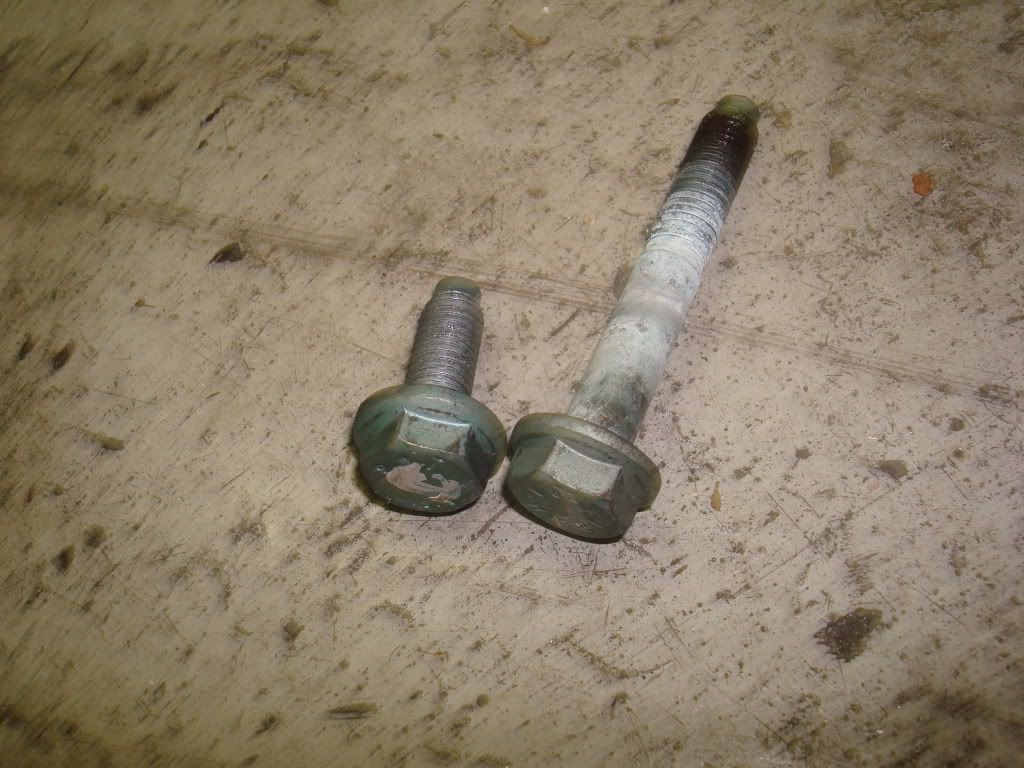
The two bolts that go into the subframe are torqued to 20Nm, plus an additional 1/4 turn (they are stretch bolts). The two bolts that go into the bottom of the transmission are torqued to 40Nm, plus an additional 1/4 turn. VW reccomends that you replace the bolts after you take them out, but there won't be a problem if you reuse the ones you've got once or twice. But, if you're worrying, go spend the $10 and get a couple new bolts! (I actually gave my bolts only an additional 1/5th turn)
Conclusion: The Forge bushings rock.
My stock ones caused my downpipe to rub a bit, plus I was getting some nasty wheelhop. After I installed my downpipe, I attempted to install the blue poly ones that came with it...what a pain! The blue poly ones are stiffer than you could possibly imagine, and I wasn't even able to compress the 2 blue pieces into the dogbone mount. I ended up using the bigger blue bushing, and the smaller black stock bushing. This worked, but the car definitely gained some nasty interior vibrations.
With the poly/stock combo, my wheelhop was drastically reduced, but the cabin comfort was also drastically reduced. The vibrations were horrible! I believe the durometer rating on these suckers is 90. I increased my idle speed up to 800 rpm with the vag com:
- engine on, warmed up at idle
- select engine
- select adaption
- select channel 01
- and enter a value from 124 to 132 (132 being highest) then save.
- Idle will immediatly rise.
Currently I set mine at 132 (800rpm)
Originally, it was at 128 (720-ish rpm)
This definitely helped reduce vibrations, but I wasn't comfortable with the poly/stock combo. The car picked up some wierd vibrations as I accelerated too.
So, I ordered the Forge dogbone mount. They are softer than the poly ones (70 durometer rating) but definitely firmer than stock.
The ride is beautiful! With my idle at 800rpm (more like 790), you can hardly tell a difference. You feel the engine a bit more, but it's definitely not intrusive. Plus, my wheelhop is almost completely gone (it's still there a wee little bit, but tonnes better than it was stock!). Also, my downpipe doesn't rub at all. If anything, I might loosen up the compression bolt to 10ft-lbs, just to smooth it out a little bit more.
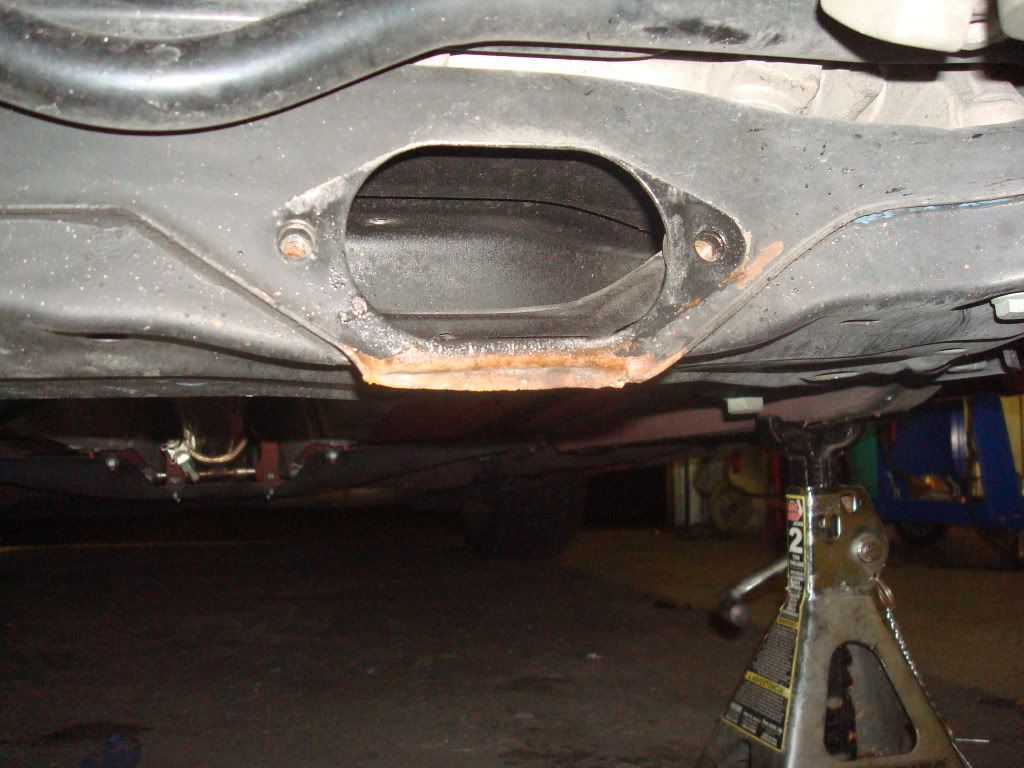 notice the times i have scraped and starting to rust .. so i sprayed some paint t cover the exposed metal