

Note – This guide was done based on installation into a 1.8T Jetta. The instructions should be exactly the same for a 1.8T GTI or Golf, but may differ for 1.8T Passats and Audis due to the engine being mounted differently.
Disclaimer: As with any Do It Yourself guide, proceed at your own risk. I am not responsible for any damage you may do to your car attempting this install.
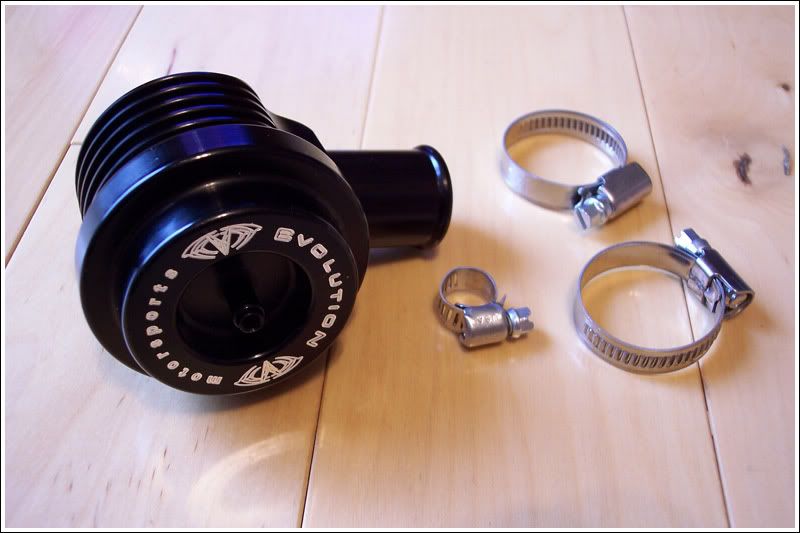
Things you’ll need are:
- Diverter Valve (Evoltion Motorsports DV used in this application, or if replacing with OEM, Volkswagen P/N: 06A-145-710-N)
- Philips screwdriver
- Needle Nose Pliers
- Flathead screwdriver
- Hose Clamps (normally provided with aftermarket unit)
- Dab of motor oil
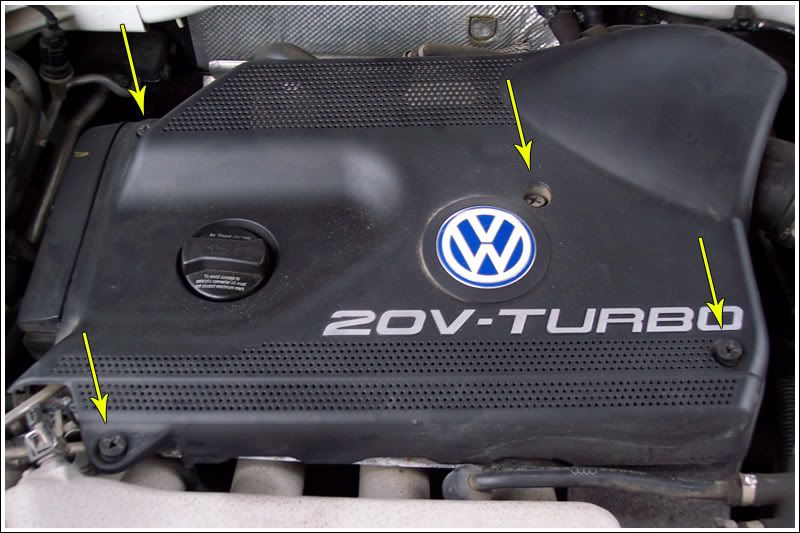
1. First step is to remove the engine cover. There are 4 pop-screws (for lack of a better word) that need to be turned in order to remove the cover. Grab your Philips screwdriver and start with one. Turn it counter-clockwise about half a turn. The screw should pop up. Move on to the others until they’ve all been loosened. Pull up to remove the cover.
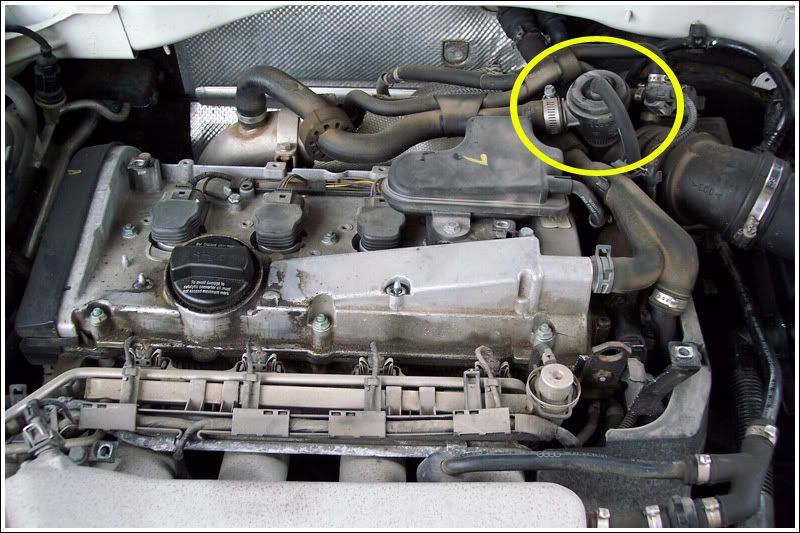
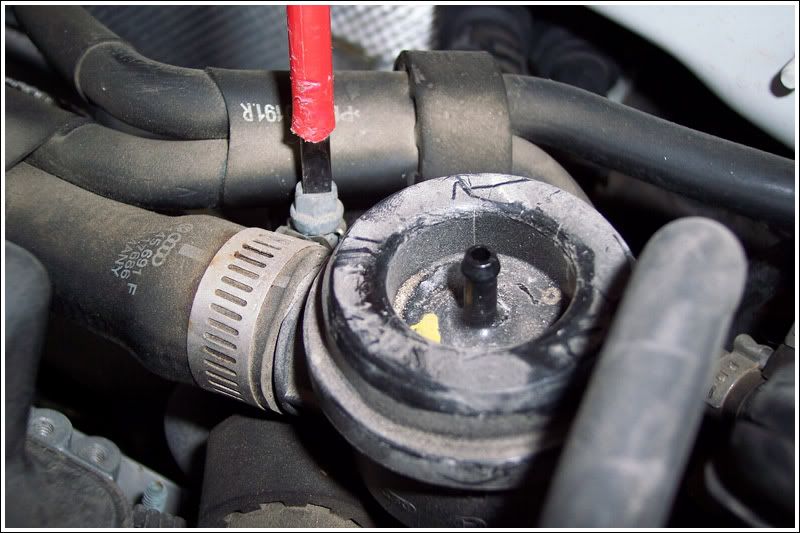
2. Next, locate your diverter valve. It’s at the back-right corner.
3. Here’s a closer look at it. You’ll need to remove the hose from the top of it, and then pull it up out of the turbo inlet pipe and right out of the hose connected on the left.
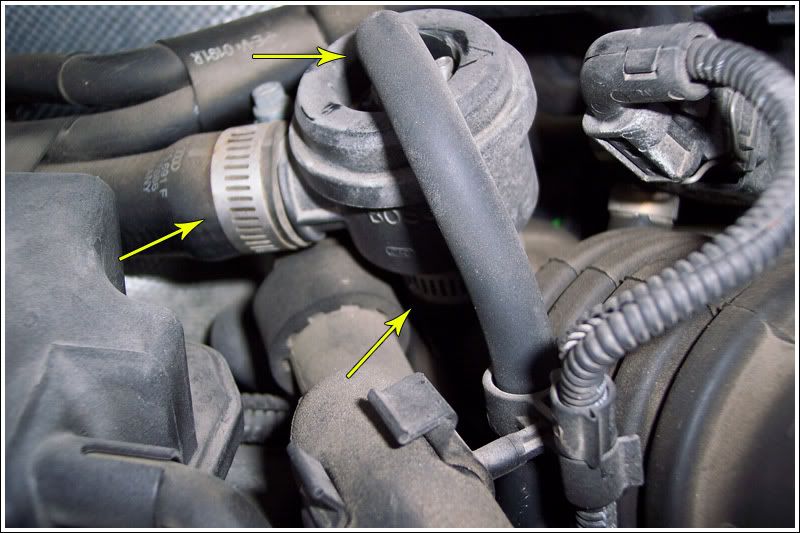
4. Start with the hose on the top, as it’ll make pulling the rest of the unit out easier. This hose is held in with a one-time-use clamp. Remove it by grabbing the clasp end with the needle nose pliers and pull gently. The tabs will release and allow you to bend the clip enough to pull the whole thing off the hose. Pull the hose off the nipple to remove it.
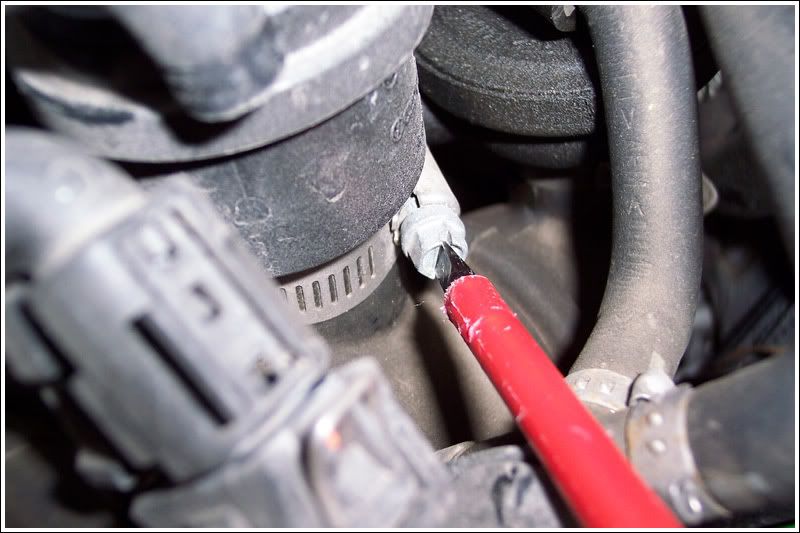
5. Now it’s time to start removing the other hoses. The other hoses will be attached with either the same type of one-time-use clamps as the top hose, or with hose clamps. My stock unit had already been replaced once because it was defective, and it seems the dealership used hose clamps when they reinstalled the unit. Follow the instructions in Step 4 if it’s a one-time-use clamp, or grab your flat-head screwdriver and start to loosen the clamps.
6. Remove the stock unit by first pulling it up and out of the turbo inlet pipe. Now pull the unit to the right to remove it from the other hose. Good!
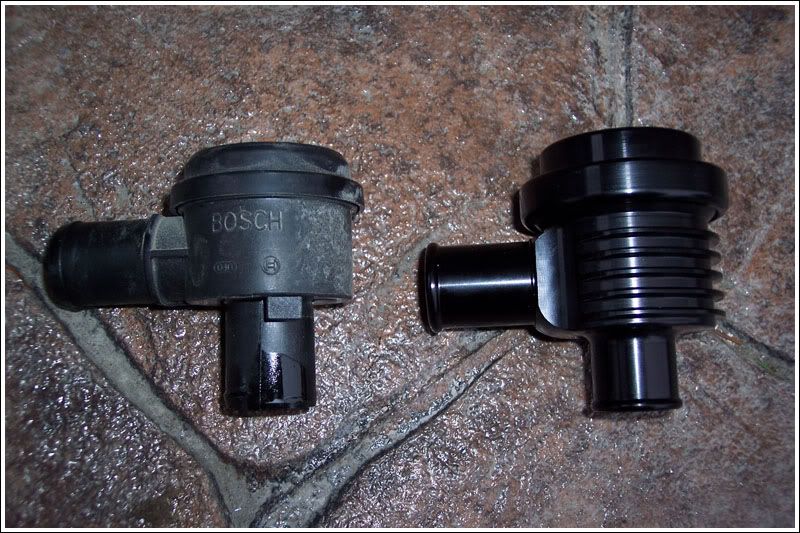
7. Here is a comparison shot of the stock unit (left) compared to the larger, more robust aftermarket unit.
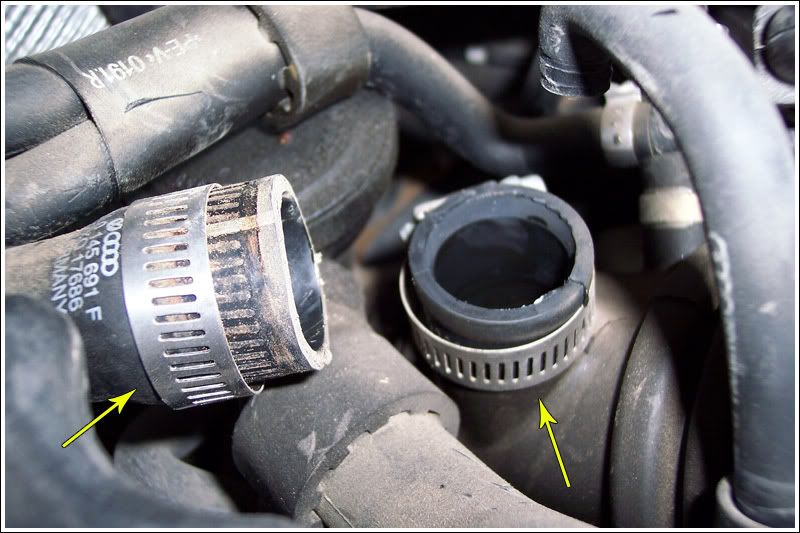
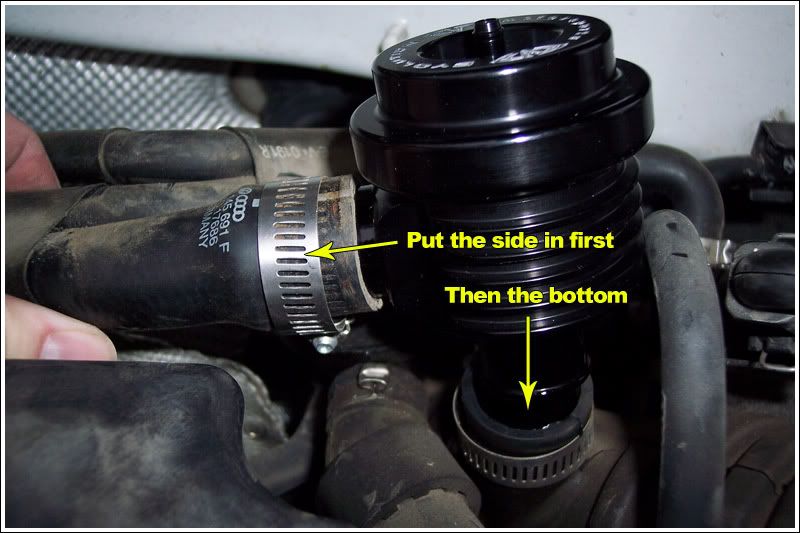
8. Here is what you’ve got after you remove the stock valve. Put the new hose clamps on the side hose as well as the bottom hose on the inlet pipe. Be careful NOT to drop anything into the bottom hose. You can clean up the hoses before doing so if you want, obviously I didn’t.
9. Time to install the new unit. Dab a bit of oil on the ends of the DV to make them easier to slide into the hoses. Start by pushing the side nipple into the side hose. Next, push the bottom nipple into the bottom hose. Tighten both hose clamps.
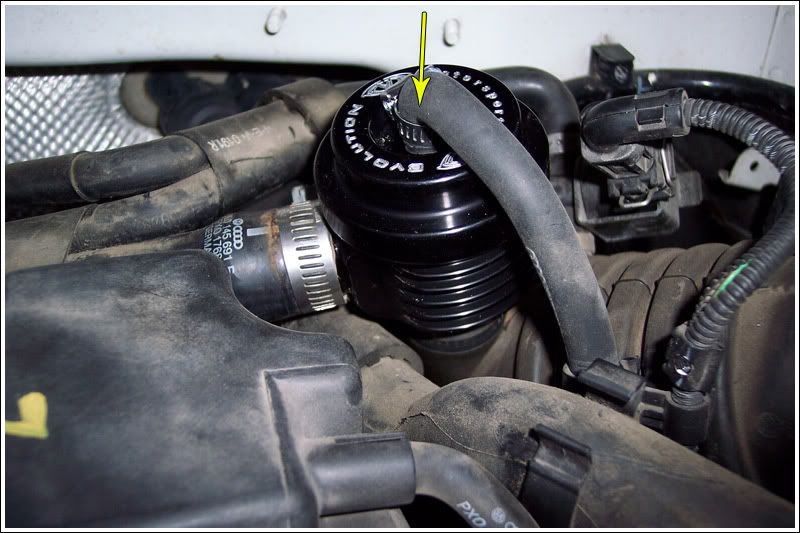
10. Time to put the top hose back on. The Evolution Motorsports unit came with a tie-wrap for the top hose. I didn’t really like the idea of using a tie-wrap so I used a very small hose clamp. Push the hose over the top nipple and tighten the hose clamp.
11. Once you’ve got everything all hooked up, turn on your car and take it for a test drive! When you get back, check to make sure all hoses are seated properly.
12. If everything is in perfect working order, put your engine cover back in place and turn the pop-screws clockwise a half-turn to lock the cover into place.
13. You’re done!