DIY 8 valve camshaft swop
Posted: Sat Jun 16, 2007 8:44 pm
This is 1.6Carbsters cam swop.
Parts needed:
1X camshaft of your choice for the swop
Valve cover gasket set
Torque wrench
10mm, 13mm, 17mm and 19mm sockets and ring spanners
5mm Allen key
Wait for the motor to cool down before working on it.
Take off the cambelt cover by loosening the two 10mm nuts on the top and the allen cap screw on the side near the bottom of the cover.....
Make sure you turn the motor to top dead centre on cylinder 1.
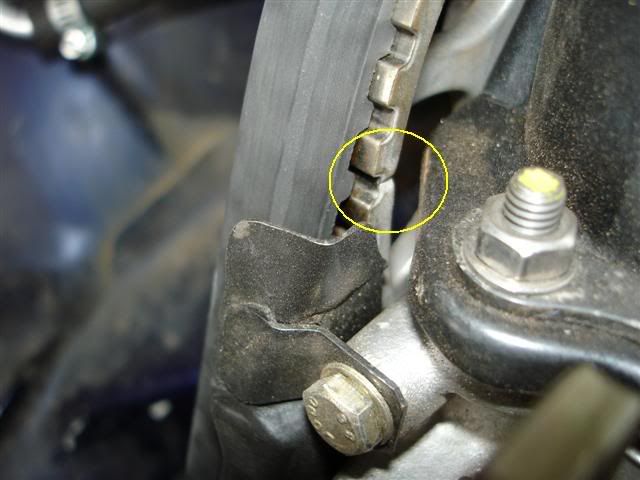
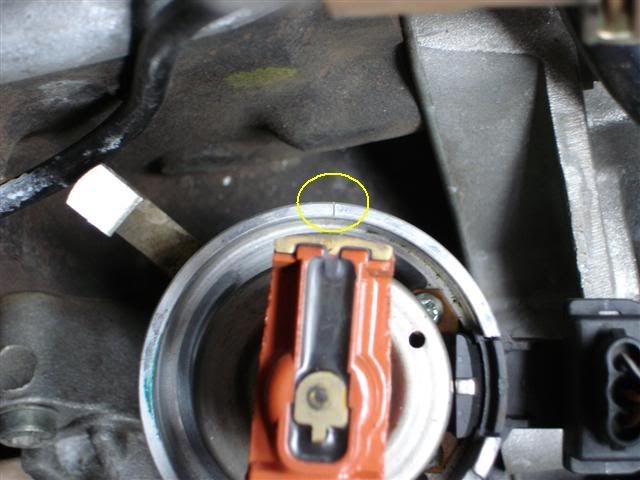
Use the crank pulley and the mark on the inside of the cam pulley to make sure. The big crank pulley has a notch in it for using to check this and for the ignition timing mark.
The mark on the inside edge of the cam pulley must sit level with the edge of the cam cover. Some pulleys will have a small dot and others have a groove.

Remove the air intake hose or if it is a carb model take off the air cleaner assembly and remove the choke and throttle cables.
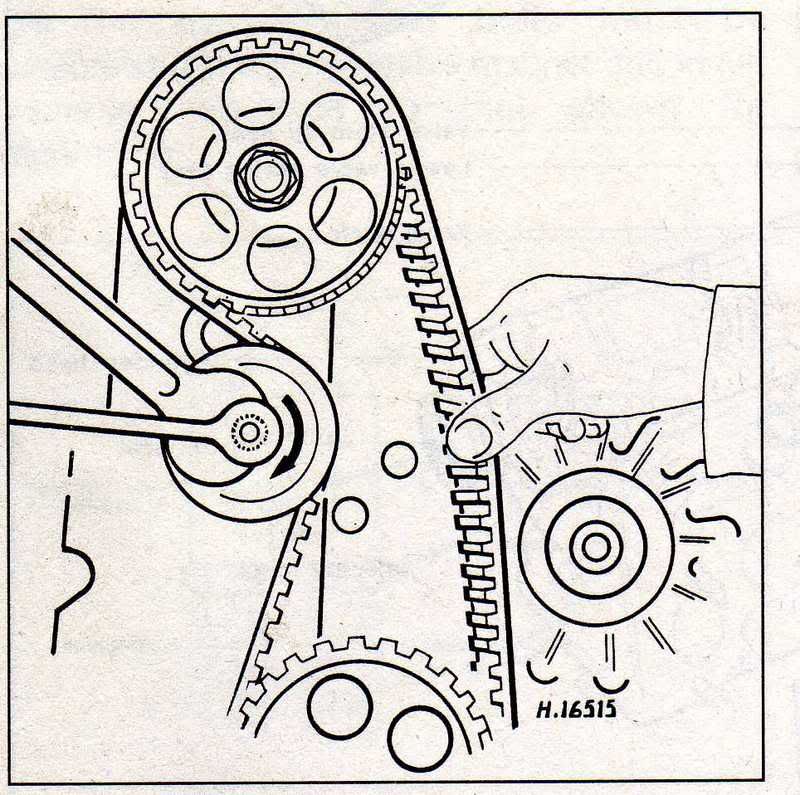
Loosen the cam belt tensioner using a 17mm spanner or socket. Slide the cambelt off the cam pulley.
Next, use a socket extension or water pump pliers or big screwdriver to wedge into one of the holes on the cam pulley. Loosen the 19mm bolt holding the cam pulley on.
This bolt is tightened to 80Nm so it's pretty tight.
Next take off the valve cover by loosening the other 6X 10mm nuts. The other 2 nuts hold the cambelt cover in place.
Take off the plastic cover on top of the camshaft as well.
Loosen the 8 nuts on the cam caps slowly in sequence. Loosen each one a little at a time. The cam will still be pushing some valves open so do it SLOWLY AND IN SEQUENCE. Note that the cam caps are numbered 1,2,3 and 5. Number 1 is on the pulley end.
It will now look like this.....
Next take out the bolt holding the cam pulley in place and the small Woodruf key in the camshaft.
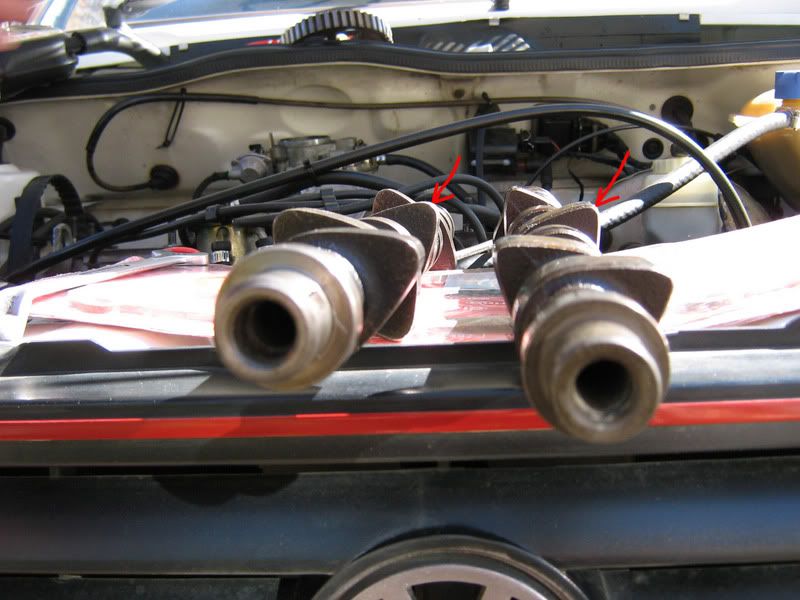
Admire the profile of the new cam. On the right is the old "G" cam, and on the left is the 268/276 split duration cam. Note the shape of the cam lobes.....the new cam has a more pronounced profile. The valves will stay open longer.
Take the new cam, put in the Woodruf key and put the pulley in place. Don't try tighten the bolt up now.
Put the cam onto the head. Double check that the mark on the inside of the pulley is in the same place as before you ripped the old cam out.
Put the cam caps back on but do not tighten anything up now.
1 or 2 of the cam caps will have to be pushed down to put the nuts back on. Next tighten the nuts up slowly and in sequence. Don't torque them up, just slowly turn them in sequence so the cam gets put in place slowly without stressing the cam by too much bending.
When the cam caps are completely in place use the torque wrench with the setting on 20Nm and torque the nuts in the same sequence as used to loosen them.
Refit the cam cover and use the new gasket.
Use the extension/screwdriver/waterpump pliers to wedge in the opposite hole in the cam pulley and tighten the pulley bolt to 80Nm.
Next put the cambelt back on the pulley and set the tension of the belt. In the Haynes manual it says the belt should just be able to be twisted through 90 degrees.
Refit any parts removed. Cambelt cover, cables, etc.
Parts needed:
1X camshaft of your choice for the swop
Valve cover gasket set
Torque wrench
10mm, 13mm, 17mm and 19mm sockets and ring spanners
5mm Allen key
Wait for the motor to cool down before working on it.
Take off the cambelt cover by loosening the two 10mm nuts on the top and the allen cap screw on the side near the bottom of the cover.....
Make sure you turn the motor to top dead centre on cylinder 1.
Use the crank pulley and the mark on the inside of the cam pulley to make sure. The big crank pulley has a notch in it for using to check this and for the ignition timing mark.
The mark on the inside edge of the cam pulley must sit level with the edge of the cam cover. Some pulleys will have a small dot and others have a groove.
Remove the air intake hose or if it is a carb model take off the air cleaner assembly and remove the choke and throttle cables.
Loosen the cam belt tensioner using a 17mm spanner or socket. Slide the cambelt off the cam pulley.
Next, use a socket extension or water pump pliers or big screwdriver to wedge into one of the holes on the cam pulley. Loosen the 19mm bolt holding the cam pulley on.
This bolt is tightened to 80Nm so it's pretty tight.
Next take off the valve cover by loosening the other 6X 10mm nuts. The other 2 nuts hold the cambelt cover in place.
Take off the plastic cover on top of the camshaft as well.
Loosen the 8 nuts on the cam caps slowly in sequence. Loosen each one a little at a time. The cam will still be pushing some valves open so do it SLOWLY AND IN SEQUENCE. Note that the cam caps are numbered 1,2,3 and 5. Number 1 is on the pulley end.
It will now look like this.....
Next take out the bolt holding the cam pulley in place and the small Woodruf key in the camshaft.
Admire the profile of the new cam. On the right is the old "G" cam, and on the left is the 268/276 split duration cam. Note the shape of the cam lobes.....the new cam has a more pronounced profile. The valves will stay open longer.
Take the new cam, put in the Woodruf key and put the pulley in place. Don't try tighten the bolt up now.
Put the cam onto the head. Double check that the mark on the inside of the pulley is in the same place as before you ripped the old cam out.
Put the cam caps back on but do not tighten anything up now.
1 or 2 of the cam caps will have to be pushed down to put the nuts back on. Next tighten the nuts up slowly and in sequence. Don't torque them up, just slowly turn them in sequence so the cam gets put in place slowly without stressing the cam by too much bending.
When the cam caps are completely in place use the torque wrench with the setting on 20Nm and torque the nuts in the same sequence as used to loosen them.
Refit the cam cover and use the new gasket.
Use the extension/screwdriver/waterpump pliers to wedge in the opposite hole in the cam pulley and tighten the pulley bolt to 80Nm.
Next put the cambelt back on the pulley and set the tension of the belt. In the Haynes manual it says the belt should just be able to be twisted through 90 degrees.
Refit any parts removed. Cambelt cover, cables, etc.